How to Create a 3D Paper Flower Wall Art Backdrop?

Time:2026-10-03 Author:Sienna
0%

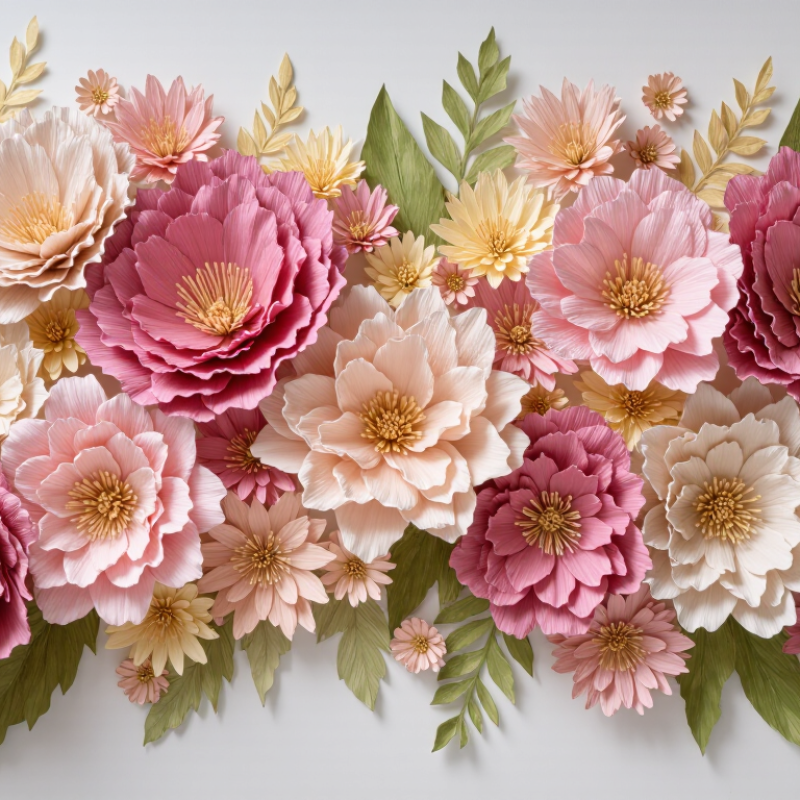
A 3D paper flower wall art backdrop can transform a plain wall into a layered focal point. It works well for weddings, photo areas, bedrooms, and creative displays. The process combines paper selection, petal shaping, color planning, and secure mounting. Each decision affects the final depth, shadow, and visual balance.

This guide explains how to create a 3D effect with paper flower wall art? You will learn how to build flowers in different sizes, curl petals naturally, and place smaller blooms behind larger ones. Lightweight cardstock usually offers enough strength without making the backdrop difficult to mount. Foam dots, folded paper tabs, or discreet adhesive strips can create controlled spacing. Leave small gaps between layers. Shadows make the flowers appear more realistic.

The first arrangement may look uneven. That is normal. Realistic displays often need adjustment after viewing them from several angles. A crowded center can hide delicate petals, while equal spacing may feel too artificial. Test a small section before covering the entire wall. Check the adhesive on an inconspicuous surface first. Paper can tear, fade, or soften in humid conditions. For reliable results, keep the backdrop away from moisture and strong heat. Use a level, measuring tape, and soft pencil marks for accurate placement. Careful preparation matters, but perfection is not the goal. A slightly irregular flower can add character.
How to Create a 3D Paper Flower Wall Art Backdrop?

Materials and Tools for a 3D Paper Flower Wall Art Backdrop

How to Create a 3D Paper Flower Wall Art Backdrop?

A strong backdrop begins with the right paper, not complicated decoration. Choose acid-free cardstock between 160 and 250 grams per square meter. Lighter sheets create soft petals, while heavier paper holds deep curves. Use two or three related colors for natural layering. Add a firm backing board, removable mounting strips, and small foam spacers for depth. I prefer matte paper because shiny surfaces can reflect harsh lighting.

You will need sharp scissors, a craft knife, a cutting mat, a pencil, and a metal ruler. A scoring tool helps create clean folds without tearing the fibers. Keep a low-temperature glue gun nearby, but test it on scrap paper first. Excess glue can leave visible bumps. I learned this after flattening one finished flower by mistake. It looked acceptable from far away, but uneven up close.

Trace petal templates in several sizes, then cut more pieces than expected. A few petals may split during shaping. Curl each edge around a pencil or gently over a rounded tool. Build flowers from the center outward, using foam spacers between selected layers. Before attaching everything, arrange the flowers on the floor and photograph the layout. The first arrangement may feel too symmetrical. That is useful feedback. Leave small gaps for shadows, and check the wall surface before applying adhesive.

Planning the Flower Designs, Sizes, and Backdrop Arrangement

How to Create a 3D Paper Flower Wall Art Backdrop?

Planning the Flower Designs, Sizes, and Backdrop Arrangement

Begin with the wall’s exact width and height. Sketch the backdrop on grid paper before cutting anything. Use three flower sizes to create depth: large blooms near the visual center, medium flowers around them, and small petals along the edges. A practical ratio is 1:2:3, with fewer large flowers and more small accents. This arrangement prevents the wall from looking flat. It also reduces wasted paper.

Material planning matters. Grand View Research valued the global paper packaging market at over 400 billion dollars in 2023, showing paper’s continued industrial relevance and availability. Smithers’ sustainable packaging research also highlights growing attention to fiber-based materials. Choose thick, responsibly sourced paper for structural petals. Test one flower first. It may curl more than expected.

Keep the color palette limited to three or four tones. Place darker flowers lower or near corners, then add lighter blooms toward the center. A 2024 report from Grand View Research identifies personalization as an important trend in arts and crafts consumption. That supports using varied petal shapes instead of repeating one template. Still, too much variation can weaken visual rhythm. Leave small gaps between clusters, especially around the focal area. Secure heavy flowers with layered backing circles, not single thin petals. Measure again after installation; paper often shifts slightly overnight.

Cutting and Shaping Paper Petals for Three-Dimensional Flowers

Creating a 3D paper flower wall art backdrop begins with well-shaped petals. Choose firm paper that bends without cracking. Medium-weight paper usually holds gentle curves better than thin sheets.

I sketch three petal sizes on paper before cutting. This prevents every flower from looking identical. A small flower may need five petals, while a larger bloom can use eight or ten. Cut slowly with sharp scissors, and rotate the paper instead of twisting your wrist. Clean edges matter. However, tiny uneven cuts can make the flowers feel more natural.

Shape each petal with a rounded tool, such as a smooth pencil or wooden stick. Press from the center toward the edge, creating a shallow cup. Then curl the tip slightly outward. Do not crease the paper sharply. Creases often look harsh under bright event lighting. For stronger dimension, cut a short slit at the petal base and overlap the edges. Secure the overlap with a small amount of adhesive. I sometimes make the first batch too narrow, so I test one flower before cutting the entire set.

Layer the petals from largest to smallest. Rotate each layer slightly to avoid visible gaps. Add a folded center or several rolled strips for texture. Leave some flowers less perfect. Real petals rarely share identical curves, and small differences give the backdrop a handmade character. Before mounting the arrangement, place it on the floor and check its depth from several angles. The outer petals may need more lift than expected.

Assembling the Flowers and Adding Layered Details

Arrange the paper flowers on the floor before attaching them to the wall. Place the largest blooms near the center. Add medium flowers around them to create a natural rhythm. Small blossoms can fill open spaces without making the backdrop feel crowded.

Assemble each flower from the center outward. Curl the petals gently with a pencil or rounded tool. Avoid sharp creases, unless you want a crisp, graphic effect. Layer two or three petal shapes, rotating each layer slightly. This small change makes the flower look fuller. Use a small amount of craft glue at the center. Too much glue can flatten delicate paper. Let each flower dry completely before moving it. I sometimes rush this step, and loose petals usually reveal the mistake later. Leave a few flowers slightly open. Perfect symmetry can make the wall look manufactured.

Tips: Mix shallow and deep flowers for stronger shadows. Place raised petals toward the light source. Test the wall adhesive on a hidden area first. Keep heavier flowers near secure points. Step back often. The design can look balanced up close but uneven from across the room. If one section feels heavy, remove a flower rather than adding more. Textured paper also catches light beautifully, especially along curled edges. Keep spare petals nearby for small repairs.

Paper Flower Wall Art Backdrop: Assembly and Layered Details

This chart shows a practical assembly plan for a one-square-meter paper flower backdrop. Larger flowers require more petals and additional layering time, while smaller flowers can be assembled more quickly and used to fill gaps between the main focal pieces.

Mounting and Arranging the Paper Flowers on the Backdrop

Mounting and arranging paper flowers determines whether a 3D backdrop looks polished or crowded. Measure the backdrop first, then mark a light grid with a pencil. This keeps the design balanced without making every flower perfectly aligned. Leave the center slightly open if people will stand there. It prevents faces from disappearing behind large blooms.

I have found that removable adhesive tabs work well on smooth boards, but test them on a hidden area first. For fabric backdrops, small clips or thread loops usually provide better support. Attach the largest flowers first, spacing them across the surface. Add medium blooms around them, then fill gaps with small flowers and leaves. Press each flower gently for several seconds. My first layout looked too symmetrical. A little unevenness made the final arrangement feel more natural. Still, a few flowers needed moving after the backdrop was viewed from a distance.

Tips: Keep heavier flowers near support points. Use a ruler for consistent spacing. Photograph the arrangement before fixing every piece. Check the backdrop from three steps away. Paper can crease easily, so handle petals with clean, dry hands. Avoid placing delicate flowers near doorways or strong airflow. A small empty area may feel unfinished at first, but it often gives the design room to breathe.

How to Create a 3D Paper Flower Wall Art Backdrop? - Mounting and Arranging the Paper Flowers on the Backdrop

Suggested Paper Flower Backdrop Plan
Flower Group Recommended Quantity Finished Diameter Backdrop Position Mounting Method Spacing Guide Arrangement Purpose
Large Statement Flowers 5–7 30–40 cm Focal area and lower corners Removable adhesive strips or concealed hook-and-loop fasteners 10–18 cm apart Creates visual anchors and defines the main composition
Medium Layered Flowers 10–14 18–28 cm Around and between large flowers Low-tack double-sided mounting tape or glue dots 6–12 cm apart Fills open areas and creates a gradual size transition
Small Accent Flowers 15–22 8–16 cm Edges, gaps, and transition zones Small glue dots or removable poster mounting putty 3–8 cm apart Adds detail without competing with the focal flowers
Paper Leaves 18–30 10–22 cm long Under flower clusters and along diagonals Glue dots or thin double-sided tape 2–6 cm from flowers Connects separate clusters and guides the eye across the wall
Raised 3D Elements 8–12 2–5 cm projection Center petals and selected outer petals Foam mounting squares or folded cardstock spacers Use selectively Produces depth and prevents the arrangement from appearing flat
Backdrop Size:
A 2.4 m × 1.8 m panel provides enough space for a balanced medium-sized installation.
Mounting Check:
Test every adhesive on a small hidden area before attaching the finished flowers.
Layout Tip:
Arrange flowers on the floor first, then mount the largest pieces before adding smaller details.

FAQS

What paper works best for a three-dimensional flower backdrop?

Use acid-free cardstock weighing 160–250 grams per square meter. Matte paper is safer under strong lighting. Lighter paper creates softer petals, while heavier paper holds deeper curves.

Which tools are needed to make the paper flowers?

Prepare sharp scissors, a craft knife, a cutting mat, a pencil, and a metal ruler. A scoring tool helps create clean folds. Test adhesive on scrap paper first.

How should each petal be shaped?

Curl the edges around a smooth pencil or rounded wooden tool. Press gently from the center toward the edge. Create a shallow cup, not a sharp crease.

How can the flowers look less identical?

Trace three petal sizes before cutting. Small flowers may use five petals, while larger blooms may need eight or ten. Tiny uneven cuts can add handmade character.

How are layered petals assembled?

Start with the largest petals and work toward the center. Rotate each layer slightly to hide gaps. Use foam spacers between selected layers for extra depth.

How should the flowers be arranged before mounting?

Place the flowers on the floor before attaching them. Photograph the layout from several angles. Leave small gaps for shadows and visual breathing room.

What mounting method suits different backdrop surfaces?

Removable adhesive tabs can work on smooth boards. Test them in a hidden area first. Fabric surfaces may need small clips or thread loops.

How can the backdrop avoid looking crowded?

Attach the largest flowers across the main support points. Add medium blooms, then fill gaps with smaller flowers and leaves. Keep the center partly open for people standing there.

What common mistakes should be checked before finishing?

Excess adhesive can create visible bumps. I once flattened a finished flower by accident. The backdrop looked acceptable from far away, but uneven up close. View it from three steps away and move anything that feels too symmetrical.

Conclusion

Creating a 3D paper flower wall art backdrop is a creative project that combines careful planning with simple paper-crafting techniques. Begin by gathering colored paper, scissors, craft knives, adhesives, rulers, pencils, and a sturdy backdrop surface. Sketch a layout before cutting, considering the flower colors, sizes, spacing, and overall arrangement. A balanced mix of large focal flowers, medium blooms, and small accents can create depth and visual rhythm.

Cut petals in different shapes and gently curl, fold, or layer them to give each flower a dimensional form. Assemble the petals from the center outward, adding smaller layers, rolled details, or contrasting centers for extra texture. How to create a 3D effect with paper flower wall art? Vary the petal angles, overlap layers, and use subtle height differences between flowers. Finally, attach the completed flowers securely to the backdrop, arranging them according to the planned design while filling gaps with leaves or small decorative elements. The result is a lightweight, personalized wall display with an impressive three-dimensional appearance.

Sienna

Sienna

Sienna is a skilled marketing professional with a deep expertise in our company’s core products and services. With a passion for innovation and detail, she plays a pivotal role in crafting insightful blog posts that not only highlight the unique features of our offerings but also provide valuable......